
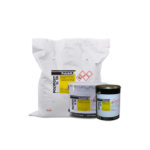
Polypoxy SL 20
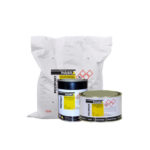
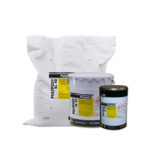
Polypoxy SL 20
Epoxy resin based self levelling floor topping
Properties
- Self Levelling
- Good resistance to a wide range of chemicals.
- Seamless floor, which helps in keeping the microbial count low
- Provides a hygienic floor which can be cleaned easily
- Provides a good abrasion resistance and dense, impervious flooring
- 100% reactive system totally free of solvents
Description
Polypoxy SL 20 is a three component, solvent free, epoxy resin based self levelling floor topping which provides a seamless, tough, chemical resistant and hygienic floor surface. It can be applied in the thickness of 1mm to 4mm, giving a glossy floor finish.
TDS For Polypoxy SL
- Step by Step
Surface preparation
Clean the surface of all dust, dirt, oil & grease, cement laitance and all loosely adhering particles. New concrete surface shall be at least 28 days old and the surface moisture content less than 5%. Captive/grit blasting and grinding is recommended for the most effective surface preparation. Surface irregularities and blow holes shall be repaired with Polypoxy BF* (Epoxy resin based blow hole filler and skimming mortar) or Ceresit RS 88* (cementitious repair mortar). Alternatively an epoxy resin based scratch coat can be used when repairing larger areas (> 0.5m2). The surface after carrying out the necessary cleaning shall be vacuumed for removing the dust debris left over after the cleaning process.
Priming
The surface shall be primed with Polyprime EP* @ 4-5 m2/L. For highly porous substrates, a 2nd coat may be required. The coating is applied when the primer is dry. However, in all circumstances, the coating shall be applied within 24 hours of application of the primer. If the primer surface is left open for more than 24 hours, then a fresh coat of primer has to be re-applied.
Mixing
Polypoxy SL 20 is supplied in three pre-weighed packs (Resin, hardener and fillers). The components are just to be mixed at site and used. However, part mixing is strictly prohibited. Take a suitable container and pour the resin (A) into it. Add the hardener (B) into the resin and mix thoroughly with a paddle mixer. Use of a slow speed drill is recommended to reduce the formation of air bubbles. Then slowly add the filler (C) into the container and mix thoroughly for a few minutes.
Application
Ensure sufficient labor and material is available at site to ensure a smooth continuity of the application of the flooring. Apply the Polypoxy SL 20 topping, by pouring on to the primed surface and spread with a steel notched trowel to achieve a 1mm to 4mm seamless topping. Once the material is evenly spread, continuous spiking with a spiked roller is to be done to remove all entrapped air. Spiking adjacent layers is recommended to be done at 50% overlaps.